11 July 2012

homemade jam


On the way to work the other day, a genius DJ decided to blast a Will Smith classic, and for the rest of the day I was singing "summer-summer-summertiiiiiime" in my mind (and most likely unconsciously humming, whistling and mumbling it out loud as well). It got me thinking about -- you guessed it -- summer, and all the things I love about the season.

One of the tops on my list is delicious, mouthwatering fruit. Summer melons, peaches, plums, nectarines, berries! So I decided that I would make some fresh, homemade jam and spread said delicious fruit on toast and sandwiches, and maybe even mix it in with a little vanilla bean ice cream. First jam on my list to tackle: peach. But I decided to give it a summer spin and turned it into *grilled* peach jam with rosemary. And it is tasty. And fairly easy. And worth the effort.

It goes a little like this....


Actual recipe:
Makes just enough to fill two 7-oz. mason jars

Ingredients:
3 yellow peaches, halved, pits removed
1 1/2 Tbsp. unsalted butter, room temp or slightly melted (but not hot)
2 cups granulated sugar
6 tsp. fresh lemon juice
2 large rosemary sprigs

How-to:
Get your grill hot (you can obviously use an outside grill or, like me, you can use a stove-top griddle; I like this cast iron one by Lodge).

Brush the butter evenly over the flesh of your peaches (not on the skin--you'll be peeling that off in about 6 minutes), then place them flat-side-down on the grill. Cook about 5 minutes until you see some good grill lines. Let them cool just until you can handle them and then slice them into 1/2 inch wedges and peel or cut off the skin.

Put the peaches into a bowl, add the lemon juice, and toss. Add the sugar and toss well. Add the rosemary and toss gently so little rosemary needles don't break off. Cover bowl with plastic wrap and let sit for four hours, stirring mixture every hour. After the fourth hour, the sugar should be pretty much dissolved, which is what you want.

Put the peach mixture into a large pot and bring to a boil over medium-high heat. Once boiling, continue cooking on med-high for about 13 minutes or until the liquid becomes syrupy. Remove from heat and discard the rosemary sprigs. Use a potato masher to crush the peaches a bit, then skim any white foam off the top of the mixture.

Pour immediately into whatever jar(s) you're using to store the jam. Let cool on a wire rack for 12 hours, then refrigerate and use within one month.

If you want to make a larger batch and preserve the jam using a traditional canning process, have at it! Since I haven't actually tried that yet (it's on my to-do list), click here for a link to Williams-Sonoma's canning instructions, which seem pretty clear.

Now, spread the jam on something and eat it. Savor the deliciousness. Repeat.
amanda

04 July 2012

happy 4th

Hope everyone has a sparkling holiday!


Image by Paul Octavious via 20x200.
amanda

29 June 2012

j'adore

Happy Friday! It's been a long week, so I decided to start the day by perusing some of my favorite sites, which always puts me in a good mood and gets me ready to face the day ahead. Colors, images, quotes...they all have a major affect on me. The ones below spoke rather loudly to me as I sipped my morning coffee and slowly joined the coherent world, so I thought I'd pass them along.

It's (almost) time for weekend frolicking and j'adore....

this truth
this iPad case + this hobo

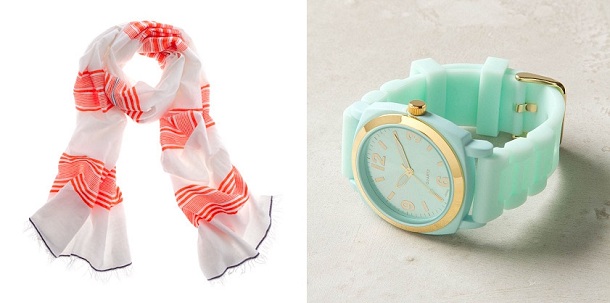
this lemlem scarf + this gummy watch

this hat

these bird sheets + these reversible quilts

this pitcher + this chandelier

these bookends

this usb mix tape + these notebooks

this slingshot pencil + these "new black" pencils

this perfectly balanced and completely awesome jenga-block-and-balloon desk

amanda

27 June 2012

sunprint notepad diy

I've always loved the look of Sunprint images and I had a bunch of scrap paper lying around the house so I thought I'd make a recycled paper notepad with a Sunprint image for the cover. It turned out so well, I had to make another one.


Making your own notepads from leftover paper or old notebooks that are sitting in a closet is really simple and fun. Here's the method I used and the books are holding up nicely.

Supplies:
Scrap paper
Mod Podge (I hear you can use plain Elmer's glue, but I haven't tried it)
Any cheap-o paint brush
Exacto knife, ruler and self-healing cutting mat (or a large paper cutter)
Binder clips
Adhesive spray (available at craft stores; for an example click here)
Thick craft paper for the back of your pad (you actually don't need this, but I like it because it makes the pad feel a bit more durable once assembled)
Sunprint for the cover (you can really use anything for the cover--cool wrapping paper, a printed photo, plain construction paper, etc.)
Single-faced corrugated cardboard wrap for the spine (or any sort of decorative/masking tape--or a plain piece of paper)

Step 1: Cut your scrap paper to whatever size notebook you want. Set aside one piece that you'll use when you add your Sunprint cover page. Step 2: Take the thick craft paper and cut one piece so it's the same size as your scrap paper.


Step 3: Gather it all together with the craft paper on the bottom and tap it down on a table so all the pieces of paper are flush on the sides--especially the spine (the side you're gluing together). Step 4: Use binder clips to hold the paper together so you can glue it without the pages moving around. Step 5: Use your cheap little paint brush to apply the Mod Podge. I like to tap the glue along the spine so that it really gets into any pieces that may not be perfectly flush; then I immediately do a second layer--this time brushing the glue evenly over the top so it's smooth. Let the glue dry for 15 minutes, then apply another layer. Technically I don't think you need it, but I like to err on the side of caution, so I paint on a third layer after another 15 minutes. Place a third binder clip in the middle of the spine after each layer to really keep the pages together while the glue dries.


Step 6: Either cut whatever you're using for a cover to the same size as your notepad paper, or make a Sunprint. Making the Sunprint is easy and looks really cool. I got my Sunprint kit from the Getty museum here in LA, but I know they sell them at hobby stores and on Amazon for $15. The directions on the kit are all you need and they're simple and to-the-point. Step 7: I cut my Sunprint paper to the same size as my notepad paper first, then I design the print. Be creative here! You can use flowers, leaves, small items like a skeleton key or buttons and even photo negatives. Arrange them on the paper however you like and then cover it with the included acrylic board. I used fern leaves to create my initial "A" on one book and a rosemary sprig and needles to spell "NOTES" on the other. Take it outside and place it in direct sunlight for 1 to 5 minutes and you'll watch the blue paper turn to almost-white.


Step 8: Submerge it in water for a few minutes and then lay it flat or hang it to dry. I also like to press it once it's dry to really flatten it out. I use my old massive dictionary and stick the print in the middle overnight.


Step 9: Cut the corrugated cardboard to the proper height and width. I cut mine so that about 1" would show on the front and back. FYI: you want the single-faced cardboard--not double-faced--so that you can bend it. Click here for an example from Paper Mart.


Step 10: Now take the dry, pressed Sunprint and use adhesive spray (don't use regular glue--it'll warp and be bubbly!) to glue it to the spare piece of notepad paper you set aside earlier. (The only reason for doing this is that the Sunprint paper is pretty thin and flimsy, so adding an additional piece of paper makes it more durable. You can skip this step if what you're using for a cover is already thick or if you just don't care about the thickness.) Step 11: Glue your cover to the front page of your notepad with a thin line of Mod Podge just next to the spine. Cover the underside of your corrugated cardboard strip with Mod Podge and press it onto the spine, then press it over the sides to adhere it to the front and back. If any of the glue seeps out, just use a paper towel to wipe it away immediately. Use the same method for a piece of paper. And if you're using tape, just stick it on.


Voila! A pretty notepad to keep next to the phone or at your bedside to jot down random thoughts, dreams, etc.
amanda

26 June 2012

i've died & gone to wallpaper heaven

You may have already heard of Flavor Paper, the innovative and super-cool wallpaper designers out of Brooklyn who make me wonder why any other wallpaper company bothers to exist (okay, you're right, that may have been a little harsh -- but I do think they're probably the coolest company out there right now creating art in the form of long strips of paper that get glued to walls). Or, as is the case for me, they may be a new discovery, so get ready to swoon!

They use a hand-screened printing process and everything is done in-house and made-to-order, which means you have the ability to customize their designs using colors that compliment your home, or whatever it is that you're wallpapering. They also incorporate a digital printing process which allows them to print their massive photo-like images to any scale you need without losing image quality.

Aaaaaaand here's the kicker: some of their patterns are Scratch-N-Sniff. Yeah, I'm serious. We're only a small step away from a scene out of Willy Wonky here, folks! And to be perfectly honest, I'm glad they stopped at the sniffing stage, because I don't think having guests wander around licking your walls would be all that sanitary.

So, without further ado, here are some of Flavor Paper's vivid, unique designs. They can flavor my walls any time....

L: Scratch-N-Sniff B-A-N-A-N-A-S!; R: Scratch-N-Sniff Cherry Forever

Cry Wolf

Epic Battle in Algae & Cape Cod

Sharp Descent

Leap of Faith

Undertow

L: Circuit; R: Bucote

Iris in 3 shades

L: City Park; R: Secret Garden

Onda

L: Brasilia; R: Tres Chic

Flavor Paper Secret Genius Lair Headquarters
Final footnote: the front windows of their Brooklyn building actually allow passersby to watch the wallpaper being hand screened and they have a massive showroom on the 2nd floor full of delicious eye candy. I can only imagine how awesome it is! One thing's certain...the next time I'm in Brooklyn, I'll be sure to find out.

Which design is your favorite?
amanda

23 June 2012

sleepy time

We spend 1/3 of our lives in bed...or so they say. Might as well do it in style....

insanely cool rocking bed
l: lotus bed; r: forest canopy bed
echoes bed
l: loire canopy bed; r: valois bed
sleigh bed
l: aurore bed; r: reclaimed wood bed
savasana bed
l: garden gate bed; r: crawford bed
keyhole metal arch bed
awesome hammock bed/circus net

Which bed would you choose? I think I'd have to go with the rocking bed...but that hammock circus net creation is pretty damn awesome.
amanda

16 June 2012

capri casa

Flipping through the latest edition of interiors magazine, I came across this amazing home in Capri that overlooks the Gulf of Naples. It was built over the remains of an ancient structure adjacent to San Michele's church. In fact, the current home was once part of the convent annex of San Michele's and maintains much of its architectural history.

I love how the architect kept the original blues and greens on the walls after he found the colors buried under layers of paint. I'm also amazed by the large bathroom; it was created from the ancient open gallery of the church. Pompeian frescoes emerged during the restoration and they now highlight the walls of the large shower. This place is awesome...a perfect balance of old and new.

It's an incredible home, but I could easily live here for the view alone....


All images via interiors magazine.
amanda